Knowledge base 220: Identity Access Pre-Installation Checks
To ensure that your software installs correctly, it is important to run through the following pre-installation checks.
1. Temporarily disable your antivirus for the duration of the installation.

Due to the amount of Anti-Virus packages, we cannot cover how to disable this within this knowledge base. We would recommend you speak to the customer's IT Team.
2. Ensure that you have Administrator access to the PC you are installing on (if you are not logged in as an administrator you will be prompted for the administrator login at the start of the installation).
3. Ensure that all Windows Updates are applied before continuing with the installation.
Administrator Permissions Check.
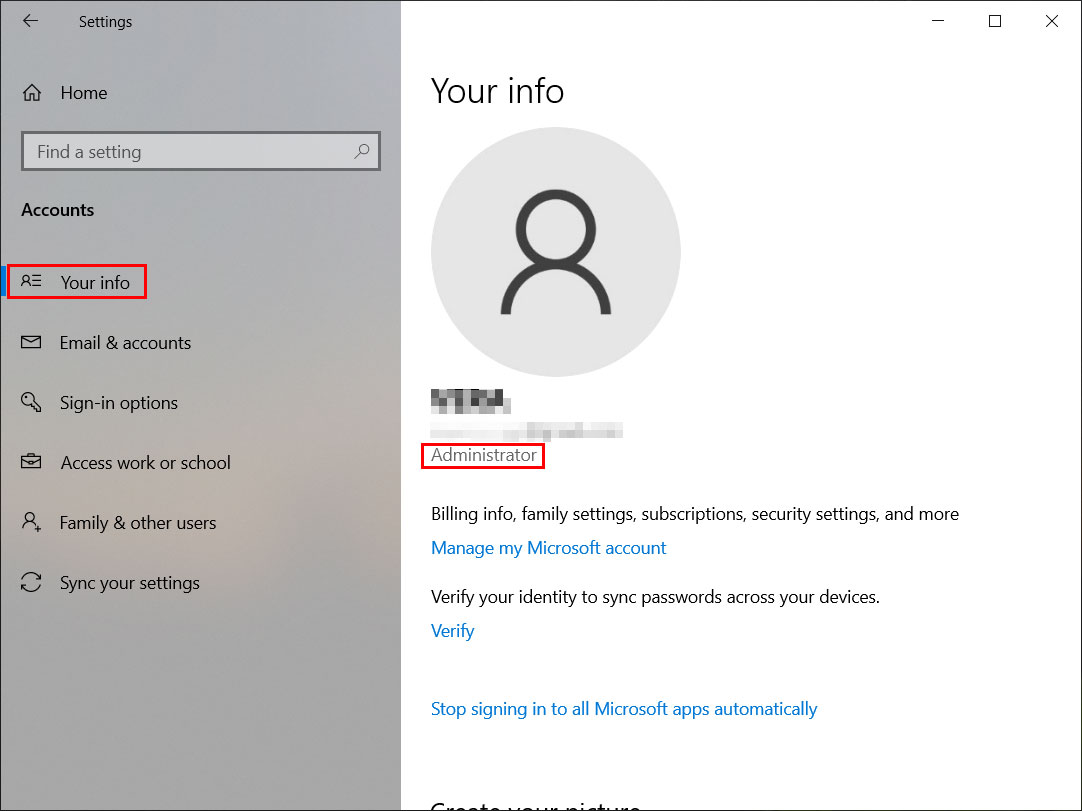
On Windows 10 / Windows Server 2019 / Windows Server 2022
Step 1: Press Windows + I to open Settings.
Step 2: Go to Accounts > Your info and check if you are an administrator under the user profile image.

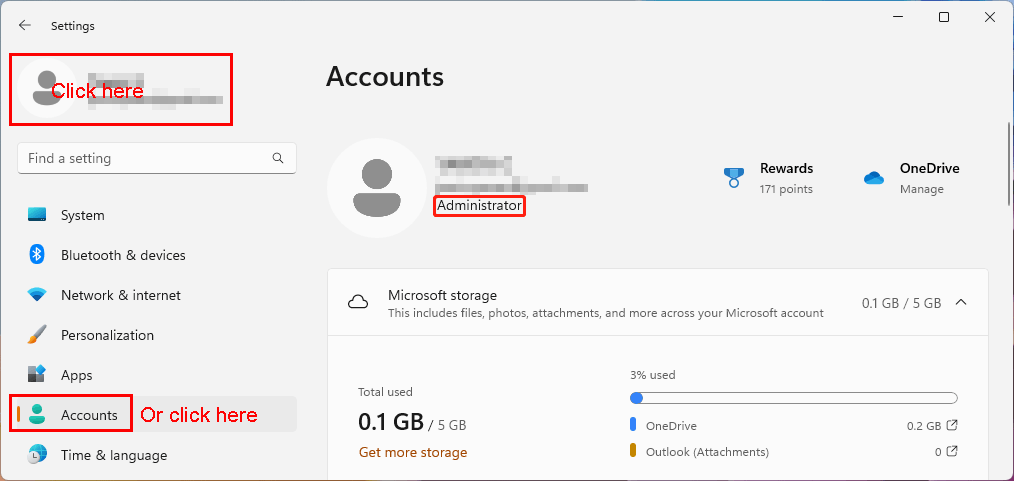
On Windows 11
Step 1: Press Windows + I to open Settings.
Step 2: Click the User profile image or click Accounts from the left menu.
Step 3: Check if you are logged in as an administrator.

Checking for Updates
Windows 10 / Windows Server 2019 / Windows Server 2022
1. Click on the Start menu and search "Updates", select "Check for updates".
2. Press "Check for Updates", ensure the page shows "You're up to date". If the there are any updates pending, please install the updates and proceed to restart the PC when required. Once the PC has restarted, check for updates again to make sure there are no other updates available before attempting to install Identity Access.
Windows 11
1. Click on the Start menu and search "Updates", select "Check for updates".
2. Press "Check for Updates", ensure the page shows "You're up to date". If the there are any updates pending, please install the updates and proceed to restart the PC when required. Once the PC has restarted, check for updates again to make sure there are no other updates available before attempting to install Identity Access.
Related Articles
Knowledge base 201: Moving Identity Access
1. Checking your Identity Access License To check whether the current installation is licensed login to Identity Access and go to Home > About. 2a. If the system shows a Professional License or Enterprise License and Version 9.XXX.XX, the license can ...Knowledge base 221: Identity Access Client Installation
If Identity Access (Client) software is to be installed and the Microsoft Windows firewall or other hardware/software providers firewall system is in use on the Identity Access (IA Server) PC then configuration to allow access is required. Once these ...Knowledge base 207: Identity Access Removed or Lost without backups
If the PC holding Identity Access software has failed and no external backup is available, then a reinstallation and recommission of the system will be required. A site survey may be required to ensure the system is setup as it was previously. Some ...New Installation
Overview of Identity Access The Identity Access (IA) Management Software from Controlsoft© is a PC-based Access Control Management system. The Identity Access software manages the access control database, which is downloaded to one or more Master ...Knowledge base 181: HID Asure ID Software with Identity Access 9
Controlsoft Identity Access 9 install includes a copy of HID Asure ID® 7. This is an ideal choice for organizations looking for affordable and easy-to-use photo ID card software with direct integration with the Controlsoft Identity Access database. ...