How to Enable and Configure Identity Access Web Client
This Knowledge Base Article will explain how to enable, access and configure the Identity Access Web Client
Prerequisites
- Identity Access Web Client requires Identity Access Version 9.1.099 or higher with either a Professional or Enterprise license.
- The Identity Access Server required internet access. Please ensure ports 443 7844 (TCP and UDP) for outbound connectivity are open
- If updating from Identity Access Version 9.1.088 or earlier, all Identity Access operators will be forced to change their password to a secure one before they can log in to Identity Access Web Client
Enabling Identity Access Web Client
1. Open Identity Access on the Identity Access Server PC. On the navigation bar along the top, click ‘System’ and select 'Configuration'
2. Within Identity Access Configuration, select ‘Services’
3. Scroll down to ‘API / WEB Service Settings’, tick ‘Enable API Server’, and then tick ‘Enable WEB Server’.
3. Press 'Apply'
4. Once enabled, your unique URL will be displayed; this is the secure web address used to access Identity Access Web

Pressing the control key on the keyboard while clicking the link will copy it to the clipboard
5. Then Press 'Accept'

After initial enabling of Identity Access Web Client, it can take up to 10 minutes before the Web interface is fully installed.
Enabling Operator Access to Identity Access Web Client

Access to Identity Access Web must be enabled for the relevant operator groups
1. Within Identity Access, select ‘System’ and ‘Operators’.
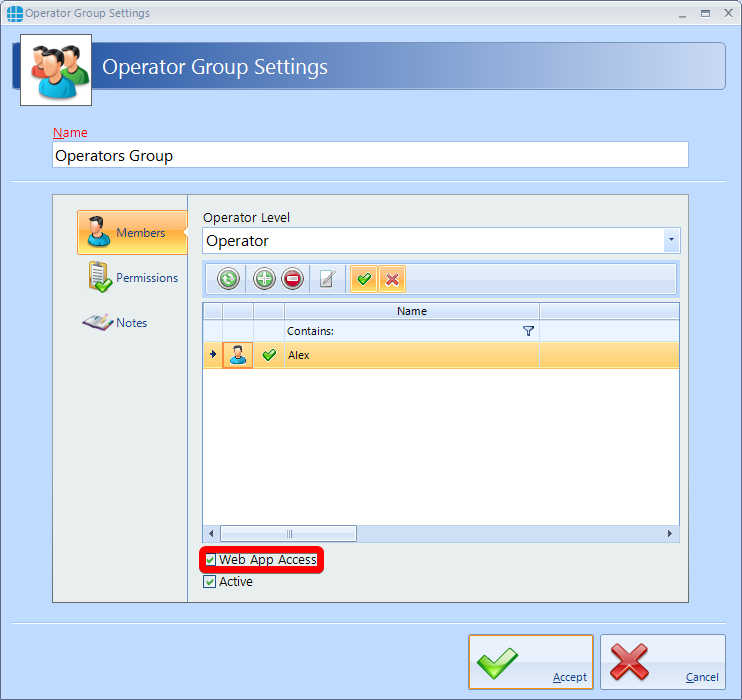
2. Right click on the Operator group you wish to provide access and select 'Edit'
3. Tick 'Web App Access'
4. If you wish to block access for remotely opening doors in the Identity Access Web Client select 'Permissions'. Scroll down and to "Graphic Viewer - Door Actions" and deselect 'Grant Access', 'Remote Release' and 'Relock'.
These actions can be individually set, for example if you wish for the operator to be able to relock a door that has been opened by another operator leave the Re-Lock action ticked.
How to Access Identity Access Web Client
1. Identity Access Web can be accessed by typing the Web URL into an internet browser. Login with your Identity Access Username and Password.
Please Note: The username and password are Case Sensitive.
If you need to find the Web URL, it is also displayed on the system info tab of the Identity Access
Please see the link below for the Identity Access Web Client Operators Guide
Related Articles
Knowledge base 90: Using MorphoManager BioBridge & Identity Access 8
1. First install Identity Access (IA), follow the Installation Guide available with the download or IA USB Stick. 2. Next log into Identity Access to do this run the IA User Interface – Windows Start Button > All Programs/All Apps> Controlsoft ...Knowledge base 181: HID Asure ID Software with Identity Access 9
Controlsoft Identity Access 9 install includes a copy of HID Asure ID® 7. This is an ideal choice for organizations looking for affordable and easy-to-use photo ID card software with direct integration with the Controlsoft Identity Access database. ...Identity Access Web Client Operators Guide
Accessing Identity Access Web Client Identity Access Web can be accessed by typing the Web URL into an internet browser. Please Note: The Username and password are Case Sensitive. If Needed, the Web URL can be found on the System Info tab of the ...What PC Specification do I need to run Identity Access?
For Identity Access: Intel i5 processor @ 3GHz 8GB RAM 100GB Free Disk Space 10/100 Network Card USB Port (for a USB enrolment reader or webcam) Screen resolution = 1280 x 800 or higher If you do have more than 10,000 users, we would recommend an i7 ...How do I run an access report?
To do this, run the Identity Access User interface and Log in. From the Dashboard, select ‘Reporting’ from the menu bar. Next, open the ‘Access Control’ Report. Customise the report with the wide range of options available, for example - the first ...